
Category: cleaning

  • How To Store And Clean Your Ski And Snowboard Gear

    How To Store And Clean Your Ski And Snowboard Gear

    I’ll never forget the time I pulled my snowboard out of the loft in mid-December, buzzing for the season to start. That buzz quickly turned into a very un-festive four-letter word when I saw the state of it. Rust had crept across the edges like ivy, the base looked like it’d spent six months in a gravel pit, and the bindings… well, they barely moved. I’d chucked it up there the previous spring with zero thought—wet, un-waxed, still crusted with mud and lift ticket stickers. Classic.

    That painful lesson stuck. I’d basically murdered my own gear with laziness. The worst part? It wasn’t even old. That board could’ve done at least another three seasons. Instead, I spent the week before my trip panic-buying a replacement and forking out more than I care to admit. Since then, I’ve taken storage and cleaning seriously—and my gear’s lasted years, not months.

    If you’ve ever opened a ski bag in autumn and recoiled at the smell, or realised your boots have gone stiff and mouldy, you’ll know the feeling. It’s easy to think “I’ll sort it later” when you get home from the slopes. But that five minutes of procrastination can cost you a fortune down the line.

    This isn’t about being fussy. It’s about keeping your kit sharp, dry, and ready to ride. Whether you’re a weekend warrior or a snow addict chasing fresh pow, treating your gear right makes a massive difference. It performs better. It lasts longer. It doesn’t reek. And it won’t leave you stranded in resort rental queues when you should be bombing it down a black run.

    This guide covers everything. Skis, snowboards, boots, helmets, gloves, jackets—the lot. We’re talking real-world advice, no fluff, no jargon, and absolutely no more heartbreak when you open your gear bag next winter.

    Let’s sort it properly this time.

    Timing Is Everything: When To Clean And Store Your Winter Gear

    It might feel tempting to lob everything into the garage the moment your plane touches down from Geneva or Innsbruck. But the timing of your cleaning and storage routine makes a world of difference—not just for hygiene, but for the longevity of your equipment.

    Right After the Trip vs. End of the Season

    Ideally, you should clean your gear after every trip, even if it’s just a long weekend in Chamonix. Dirt, moisture, and salt from roads or artificial snow can cause early corrosion or breakdown of materials. If you wait until the season’s over, you’re likely letting grime sit and do its worst for weeks or months. That’s how boots start to smell like death and ski edges end up rusted to bits.

    That said, full end-of-season maintenance is still needed even if you’ve been good about post-trip cleaning. This is when you get into long-term storage prep, not just a basic wipe-down.

    Best Time of Year for Deep Maintenance

    Late spring is your sweet spot for a full clean and service. You’ll have a better idea of wear and tear after your final trip, and ski shops often offer end-of-season tune-up deals in April and May. Plus, cleaning your gear now means it’s ready to go the minute the first snow falls—no last-minute faff.

    Why Timing Matters for Storage Conditions

    Putting wet or dirty gear into storage is a bit like sealing a sandwich in clingfilm and leaving it on the radiator. Mildew, rust, and bad odours thrive in enclosed spaces with trapped moisture. Your best bet? Clean, dry, and store everything once temperatures are mild and humidity’s low—think late April to early June in the UK.


    Skis And Snowboards: Detailed Cleaning And Storage Strategies

    Skis and snowboards are tough, but they’re not invincible. Base damage, rust, and binding corrosion can all creep in if you’re not careful. Here’s how to give them proper TLC.

    Step-by-Step Cleaning Process

    • Remove any stickers or lift passes. Use citrus-based goo remover or a dab of rubbing alcohol.
    • Scrape off old wax with a plastic scraper—especially if you hot-waxed it mid-season.
    • Use a base cleaner (citrus-based or dedicated ski base cleaner) and a clean cloth to remove grime, oil, and residue.
    • Check for core shots or base damage. If you see exposed fibreglass or wood core, take it to a technician for repair.
    • Examine the edges for rust or burrs. Minor rust can be removed with a gummy stone or fine-grade sandpaper (600–1000 grit).

    Waxing For Storage

    This is key. Hot waxing your base before storage prevents it from drying out and oxidising. But don’t scrape it off! Leave the thick coat on—the wax acts like a sealant for both base and edges.

    Use an all-temperature hydrocarbon wax unless you’re super fussy about snow temp ranges. Iron it on as usual, but skip the scraping step. Let that layer sit until next season.

    Binding Care

    Snowboard bindings and ski bindings both need a proper once-over:

    • Tighten screws and check for cracks in plastic or metal parts.
    • For snowboards: Loosen the screws and store the bindings off the board if you’re not riding for months.
    • For skis: Leave DIN settings alone unless your weight or skill level’s changed—just make sure bindings are dry and rust-free.

    Storing Boards And Skis Properly

    • Store them vertically or on their sides—never flat on the ground.
    • Use ski ties to prevent brakes or bindings scratching each other.
    • Keep them in a dry, room-temperature space. Avoid sheds, garages, or attics that fluctuate in temperature and humidity.
    • Don’t bag them up in non-breathable plastic. Use a fabric ski bag if needed, but leave zips open slightly to let air circulate.

    Boots: Cleaning, Drying And Preventing Odours

    If there’s one bit of kit that turns nasty the quickest, it’s your boots. Whether we’re talking ski boots or snowboard boots, these things get sweaty. Neglect them and they’ll repay you with a pungent cloud next season.

    Cleaning the Outside

    • Use a damp cloth with mild detergent or specialised boot cleaner to wipe down the plastic shell or synthetic exterior.
    • Don’t soak them—just enough to shift salt and grime.

    Inside the Liners

    Most modern ski and snowboard boots have removable liners. Always take them out.

    • Air dry them fully—never near direct heat like radiators, as it can warp the shape.
    • Sprinkle bicarbonate of soda inside if they’re pongy, and vacuum it out after a few hours.
    • For gnarly odours, use a boot deodoriser spray, or insert cedar wood shoe trees—they absorb moisture and smells.

    If liners aren’t removable, use a boot dryer or stuff with newspaper and change it out every few hours until fully dry.

    Inspect and Maintain Hardware

    • Check buckles, laces, and BOA systems for fraying or sticking.
    • Apply silicone lubricant to buckles or hinges if needed.
    • If soles are worn, consider getting them replaced—especially ski boots with GripWalk or ISO 5355 soles that are safety-critical.

    Storing Boots The Right Way

    • Buckle them loosely (not fully tight) to maintain shape.
    • Store upright in a cool, dry space—never dump them in a gear bag and forget about them.
    • Avoid extreme cold or heat. Garage floors and lofts are some of the worst places for boot longevity.

    Jackets, Salopettes, and Base Layers: Proper Outerwear Care

    Snow gear takes a beating—sweat on the inside, snow and grit on the outside. But unlike your board, you can’t just give your jacket a scrub with a wire brush and call it a day. Treat your technical clothing right and it’ll keep performing for years.

    Washing Waterproof Outerwear (Shells & Insulated)

    Most snow jackets and trousers are made with technical fabrics—GORE-TEX, Dermizax, HyVent, or other waterproof-breathable membranes. Standard detergent will wreck the DWR (Durable Water Repellent) coating, so don’t just chuck them in with your jeans.

    Do this instead:

    • Use a specialist wash like Nikwax Tech Wash or Grangers Performance Wash.
    • Wash on a gentle cycle at 30°C.
    • Rinse twice if needed to remove residue.
    • Don’t use fabric softener. It clogs the waterproof membrane and kills breathability.

    Restoring Water Resistance

    Once clean, apply a DWR treatment while the gear is still damp:

    • Use a spray-on or wash-in DWR restorer (Grangers, Nikwax, etc.).
    • Tumble dry on low heat for 20–30 minutes to ‘set’ the treatment—if your care label allows.

    Base Layers and Mid Layers

    Merino wool, synthetic thermals, fleece tops—they all benefit from proper washing:

    • Avoid bio detergents for merino; go for wool-safe options.
    • Turn garments inside out.
    • Air dry to maintain fit and elasticity. Avoid hot dryers.

    Smelly base layers? A cold vinegar soak before washing (1:3 ratio with water) will kill bacteria. Let them air out fully before packing away.

    Storage Tips

    • Hang up jackets and trousers; don’t fold or cram them into boxes.
    • Use fabric garment bags if storing in wardrobes for long periods.
    • Keep base layers in breathable cotton bags or drawers—not plastic tubs that trap moisture.

    Gloves, Socks, Neck Warmers, and Beanies: Small Items, Big Smells

    The soft stuff often gets overlooked—but it’s also the first to stink and mould if left damp. Your gloves and socks are probably the sweatiest things you wear after a big day on the hill, yet most people shove them in a bag and forget they exist until the next season.

    Gloves

    There are two types to deal with here: synthetic waterproof gloves and leather gloves or mitts.

    Synthetic Gloves:

    • Hand wash with warm water and Tech Wash or a gentle detergent.
    • Squeeze out water without wringing.
    • Dry flat, fingers facing up.
    • Don’t put them on a radiator—they’ll lose shape and the inner lining may shrink.

    Leather Gloves:

    • Wipe the outside with a damp cloth.
    • Treat with a leather balm or waterproofing wax (like Hestra Leather Balm).
    • Never soak them.
    • Stuff them lightly with newspaper to hold shape while drying.

    Inner Liners (if removable): Wash these separately—machine-washable liners can go in a mesh bag at 30°C.

    Socks and Base Accessories

    • Use a non-bio detergent to keep technical fibres intact.
    • Wash at 30–40°C.
    • Air dry—don’t tumble, especially for compression socks or wool blends.

    Top Tip: Wash socks inside out to get rid of dead skin and built-up bacteria. It’s gross, but it works.

    Storage for Accessories

    • Keep gloves flat and dry in breathable boxes or fabric bins.
    • Avoid vacuum sealing—natural fibres like wool need to breathe.
    • Store neck warmers and beanies in a clean drawer with lavender sachets or cedar blocks to fend off moths and smells.

    Helmets and Goggles: Keep Vision Sharp and Heads Safe

    These two bits of kit are easy to damage with good intentions. One wrong move and you’re looking at foggy lenses or compromised head protection. Here’s how to clean them without doing harm.

    Helmets: Cleaning and Storage

    Exterior:

    • Use a damp cloth with mild soap—no harsh chemicals or alcohol-based wipes.
    • Focus on areas with stickers, goggle strap grime, or sweat lines.

    Interior Padding:

    • If removable, take it out and hand wash with mild detergent.
    • Rinse thoroughly and air dry completely before refitting.
    • If fixed, spray lightly with helmet-safe fabric cleaner and wipe with a damp cloth.

    Straps and Buckles:

    • Wipe down with soapy water.
    • Check buckles and adjusters for cracks or stiffness—these can fail without warning.

    Storage:

    • Store your helmet in a soft helmet bag (often provided when purchased).
    • Keep it on a shelf or in a cupboard, not in a gear bag or garage floor.
    • Avoid high heat—polycarbonate shells and EPS foam can degrade.

    Goggles: Don’t Scratch or Smear the Lenses

    Goggles are delicate. The inside of the lens often has an anti-fog coating that’s not scratch-proof.

    Cleaning Tips:

    • Don’t wipe the inside of the lens when wet—it’ll ruin the anti-fog layer.
    • Let goggles dry completely, then use a clean microfibre cloth to gently dab the inside.
    • Wipe the outside only with a microfibre cloth.
    • For stubborn grime, rinse with lukewarm water and shake off excess before air drying.

    Straps and Foam:

    • Check for mildew, stiffness, or crumbling foam. If the foam’s degraded, it’s time to replace the goggles.
    • Straps should still stretch without fraying—if they’re crusty or cracked, bin them.

    Storage:

    • Always store in a goggle case or soft bag—no exceptions.
    • Keep away from direct sunlight, which can warp the lens or cause discolouration.
    • Never leave goggles in your helmet; they’ll press against the foam and lose their shape.

    Storing Your Gear for the Off-Season

    Packing everything away for the warmer months isn’t as simple as chucking it all in a bin bag and stuffing it under the bed. The right storage setup makes all the difference between fresh, ready-to-go gear and a smelly, mildew-ridden mess come next winter.

    Ideal Storage Conditions

    You want somewhere cool, dry, and dark. Think airing cupboard, wardrobe, or a well-ventilated loft—not the shed or garage unless they’re insulated.

    • Humidity: Keep it low. Moisture encourages mould and rust.
    • Temperature: Stable is best. Avoid anywhere that gets boiling in summer and freezing in winter.
    • Sunlight: UV breaks down fabrics and plastics—keep everything out of direct sun.

    Best Practices for Storing Different Gear

    • Skis and Snowboards: Store standing upright or lying flat. Loosen bindings to reduce tension on springs. Avoid hanging by tips.
    • Boots: Buckle them loosely to maintain shape. Stuff with newspaper or boot shapers.
    • Clothing: Hang outerwear on broad hangers. Store base layers in breathable fabric bags.
    • Goggles and Helmets: Store in their own cases. Keep lenses separate from foam to prevent warping.
    • Accessories: Use labelled boxes or cotton bags. Never store gloves or socks unless they’re 100% dry.

    Smell Control and Pest Prevention

    • Toss in silica gel packs or charcoal sachets to absorb moisture.
    • Cedar blocks or lavender sachets keep moths away.
    • Avoid scented drawer liners or strong oils—they can damage rubber and synthetics over time.

    Labelling and Organisation Tips

    This is the bit people skip—and regret later.

    • Group gear by person or type in stackable crates.
    • Use clear boxes if possible, or attach laminated inventory sheets.
    • Store frequently forgotten bits like wax kits, tools, lift passes, and gaiters in a “spares” box.

    What NOT To Do – Common Mistakes That Wreck Gear

    You’d be surprised how many clever people do things that quietly ruin their kit. Let’s run through the top offenders so you can avoid throwing money down the drain.

    Using the Wrong Cleaners

    Dish soap, laundry detergent, bleach—these are death to technical fabrics and waterproof membranes. Same goes for household glass cleaner on goggle lenses.

    Stick to: Products made for outdoor gear (Nikwax, Grangers, TOKO, etc.).

    Storing Gear While It’s Damp

    One wet glove in a sealed bag can grow enough mould to stink out your whole loft. Never pack away anything unless you’re certain it’s bone dry—inside and out.

    The worst culprits:

    • Boot liners
    • Glove fingertips
    • Sock toes
    • Inner goggle foam

    Drying Too Aggressively

    Radiators, hairdryers, or tumble dryers on full blast can shrink, warp, or de-laminate materials.

    • Boots may become misshapen.
    • Outerwear may lose waterproofing.
    • Helmet padding can crack or deform.

    Use ambient airflow and patience instead. Boot dryers or low-temp tumble dryers (if permitted on the care label) are fine.

    Improper Ski/Snowboard Storage

    A few bad habits can ruin your edges or warp your board:

    • Leaving tension on bindings
    • Storing in a hot attic or damp garage
    • Letting base wax dry out without summer wax protection
    • Using ski straps too tightly (causes camber distortion)

    Neglecting Small Repairs

    It’s easy to ignore minor issues after your last trip, but they snowball:

    • A frayed goggle strap will snap next season.
    • Minor delam on a ski tip can split wider.
    • Worn boot liners will compress further and destroy foot support.

    Take notes post-trip and sort repairs before storage, not after.


    Long-Term Maintenance Tips and Annual Checks

    Treat your ski and snowboard gear like you’d treat a car—it needs an annual service. A little care here saves big cash later and keeps you safe and comfy on the slopes.

    Ski and Snowboard Tune-Ups

    Even if you’re not riding for months, your edges and bases deserve attention:

    • De-burr edges: Use a diamond stone or soft file to knock off nicks from rails and rocks.
    • Base fill: Melt in P-Tex to fill any gouges.
    • Edge check: Look for rust, especially under bindings and near tips.
    • Summer wax: Apply a thick hot wax layer and leave it on—don’t scrape. It prevents base drying and keeps out air.

    Come next season, scrape it off and you’re good to go.

    Boot Servicing

    • Check footbeds and liners: If they smell or feel flat, replace or wash.
    • Inspect soles: Worn tread? Many boots have replaceable grip pads.
    • Buckles and BOA systems: Make sure everything tightens smoothly.

    Some boot fitters offer liner refitting or minor shell punching—perfect time to fix niggling issues before they worsen.

    Outerwear Refresh

    • Reapply DWR every 12–18 months, even if gear looks clean.
    • Check seams, zips, and velcro for signs of failure.
    • Mend small tears or frays with fabric patches or send to a specialist repair service.

    Helmet and Goggle Lifespan

    Helmets don’t last forever—materials degrade, even without impact. Replace every 3–5 years, or sooner if dropped or bashed.

    Goggles also wear down:

    • Foam hardens or flakes.
    • Lenses scratch or lose coating.
    • Elastic in straps weakens.

    If fogging gets worse despite cleaning, it’s time for a new pair.

    Insurance & Inventory

    Not glamorous, but useful:

    • Photograph all gear and serial numbers.
    • Keep receipts and model names.
    • Store info digitally in case of theft or travel claims.

    Gear Lifespan and Knowing When to Replace

    There comes a time when even your most beloved snowboard or trustiest boots have had enough. No amount of waxing, patching, or DIY repairs can fix certain issues—and hanging onto tired gear can make your day on the mountain more painful than fun.

    Skis and Snowboards

    With proper care, most boards and skis last between 80 to 100 full days of riding. That’s roughly 5–8 years for an average snow-holiday goer.

    Signs it’s time to upgrade:

    • The base dries out quickly, no matter how often you wax.
    • Edges feel dull, thin or rusted through.
    • Major core shots or delaminated spots are spreading.
    • You’ve outgrown the flex, shape or feel of the setup.

    If your style or weight has changed, your board might not match your riding anymore. Don’t keep a board that feels like hard work.

    Boots

    Boots lose support before they fall apart. After 100+ days of riding, liners compress and materials soften, affecting both comfort and control.

    Check for:

    • A wobbly heel or loose feel even when tightened.
    • Flattened liner foam or odd pressure points.
    • Cracking plastic or broken buckles.
    • Tread worn smooth—especially if you hike a lot.

    If you dread putting them on, it’s time.

    Bindings

    Bindings often outlive boots but still have a shelf life. Expect 5–7 seasons of reliable use, or less with heavy park abuse.

    Warning signs:

    • Ratchets slip or strip.
    • Straps crack or delaminate.
    • Highbacks feel flexy or loose.
    • Mounting screws won’t tighten snugly anymore.

    Don’t wait for them to fail on a powder day.

    Helmets and Protective Gear

    These have one job—protect your head and body. And they don’t last forever.

    • Helmets: Replace every 3–5 years even without impact. One proper crash = bin it.
    • Impact shorts, back protectors: Foam degrades with use. Replace if they compress easily or feel too thin.

    Outerwear

    If you’re patching up your jacket after every trip or reapplying DWR monthly, it might be time to call it. Gore-Tex can’t be resurrected forever.

    Watch for:

    • Persistent wetting out even after reproofing.
    • Zips and seams that fail repeatedly.
    • Obvious rips that tape won’t hold.

    You deserve to be dry and warm, not soggy and grumpy.


    Eco-Friendly Cleaning and Disposal Options

    Snow sports gear isn’t exactly low-impact, but you can make smarter choices when it comes to cleaning, maintaining, and eventually replacing your kit.

    Planet-Friendly Cleaning Tips

    • Use biodegradable cleaners like Nikwax Tech Wash, TOKO Eco Textile Wash, or Grangers Performance Wash.
    • Spot clean instead of washing whole garments too often.
    • Wash in cold water with full loads—less microfibre shedding and less energy use.
    • Skip the tumble dryer unless it’s needed to activate waterproofing.

    Some products let you re-waterproof gear without heat—check the label.

    What to Do With Worn-Out Gear

    Don’t just bin it. A lot of gear can be recycled, repurposed, or passed on.

    Outerwear and Clothing:

    • If it’s still wearable, donate to charity shops or outdoor community groups.
    • Some brands offer take-back schemes (Patagonia, The North Face, etc.).
    • Cut up non-donatable items for rags or patch kits.

    Skis, Boards and Bindings:

    • If usable, donate to ski clubs or schools.
    • Broken boards can be turned into furniture, shelves, or wall art.
    • Metal bindings and poles can often be recycled at scrapyards—remove plastic parts first.

    Boots:

    • Some cobblers or ski shops accept used boots for parts.
    • Worn-out liners can be recycled as foam in some council tips—check local policies.

    Helmets:

    • Never donate a used helmet.
    • Most councils won’t recycle mixed materials, but you can sometimes dismantle the foam from the plastic shell for proper disposal.

    Green Upgrade Tips

    • Choose gear with recycled materials or PFC-free DWR.
    • Buy second-hand from ski swaps or resale apps.
    • Repair instead of replace. Use gear-specific patches, boot glues, and seam sealers.

    Supporting eco-friendly ski brands or circular services means less waste and guilt all round.


    Final Thoughts: Look After Your Kit and It’ll Look After You

    There’s nothing like standing at the top of a fresh run with gear that feels just right. No pinching boots, no soggy gloves, no snapped poles—just smooth, stress-free riding.

    That doesn’t happen by accident. It comes from a bit of care, smart storage, and knowing when something’s past its best. Whether you’re a one-week-a-year rider or a powder hound clocking 50 days each season, the time you spend cleaning and prepping your gear always pays off.

    Keep your board waxed, your boots dry, and your outerwear in decent shape, and you’ll save money, ride safer, and squeeze more joy from every trip.

    And who knows—you might even start looking forward to unpacking it all next winter. No mystery smells, no mouldy surprises. Just you, your kit, and the mountains waiting.
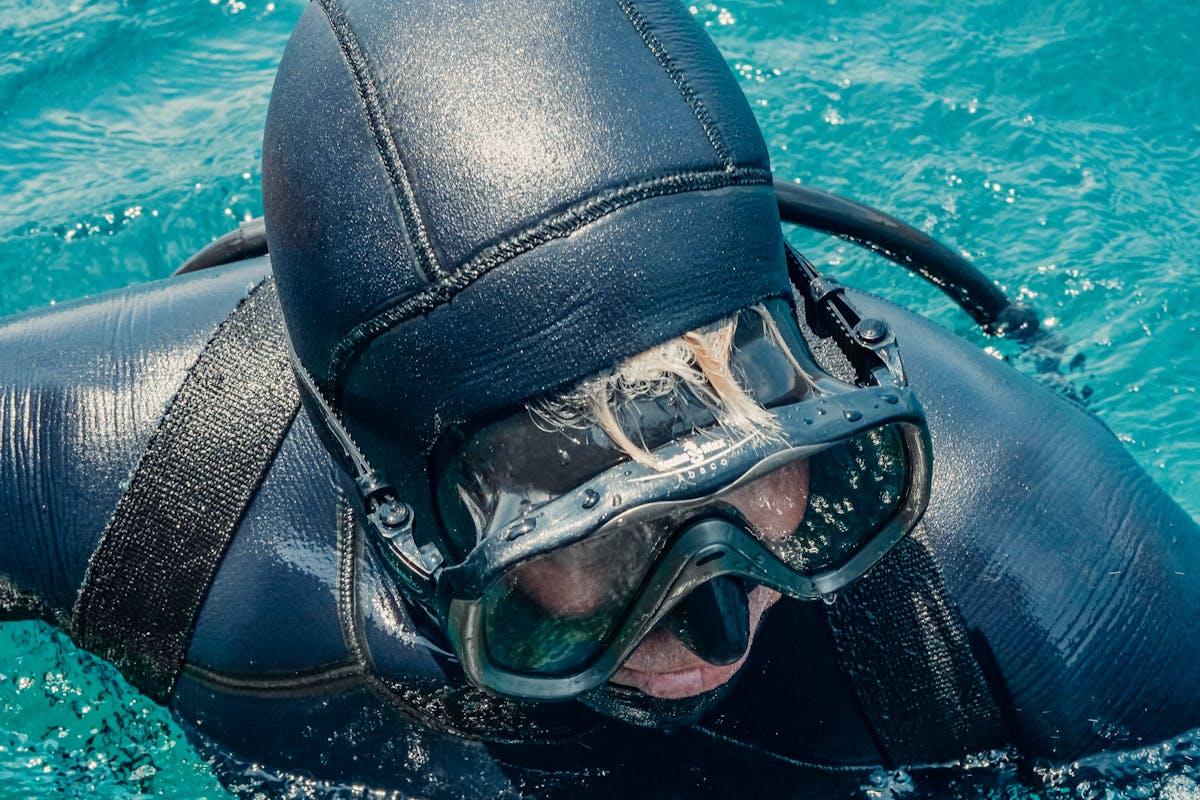

  • Everything You Need To Know About Cleaning Your Diving Gear And Wet Suits

    Everything You Need To Know About Cleaning Your Diving Gear And Wet Suits

    I still remember the first time I went diving like it was yesterday. I’d just arrived in Koh Tao, all wide-eyed and sunburnt, armed with a cheap underwater camera and dreams of swimming with turtles. The dive shop was this tiny place tucked between a pancake stall and a reggae bar. The gear looked alright. At least, I thought it did.

    We kitted up, did our buddy checks, and waddled down to the beach like nervous penguins. By the time we were ten metres under, I felt like I’d stepped into another world. But just ten minutes in, I realised something wasn’t right. My mask kept fogging up, the snorkel tasted like an old sock, and my BCD inflator button stuck every time I pressed it. I surfaced early, frustrated and a bit shaken.

    Back on land, the instructor gave the gear a once-over. “Yeah,” he muttered, pulling a stringy lump of seaweed from the mouthpiece, “this one’s overdue for a rinse.” That sentence stuck with me far longer than the dive itself.

    Since then, I’ve clocked hundreds of dives across reefs, wrecks, caves, and open seas. I’ve learnt that good diving isn’t just about buoyancy skills or having a GoPro strapped to your head. It’s about trusting your equipment—knowing it’s clean, working properly, and won’t let you down when you’re twenty metres underwater with a strong current and a tank that’s slowly emptying.

    Diving gear takes a proper beating from salt, sun, sand, and body oils. Sweat, sunscreen, even pee—yeah, let’s be honest, it happens—get soaked into wetsuits. If you don’t clean your kit properly, the risks build up quickly. And I’m not just talking about a bad smell or cracked rubber. I’m talking infections, equipment failure, and the kind of slow damage that shortens the life of gear you spent a small fortune on.

    This article covers everything I’ve learnt—often the hard way—about keeping diving gear in top shape. From mouthpieces to weight belts, wetsuits to tanks, I’ll break down the best way to clean each bit, why it matters, and how skipping just one rinse can cost you more than you’d think. Whether you’re a weekend diver or a certified instructor, it pays to treat your gear like the life support system it really is.

    Let’s get into it.

    Why Cleaning Matters More Than You Think

    It’s easy to brush off gear cleaning as just another boring post-dive chore. After all, the dive’s done, the adrenaline’s faded, and the nearest cold pint or beach hammock is calling your name. But here’s the truth—neglecting your kit isn’t just lazy, it’s risky.

    Every single item you use underwater is exposed to salt, bacteria, sand, and in tropical locations, algae and tiny parasites too. Salt is especially vicious. It doesn’t just sit there looking pretty—it corrodes metal, eats away at stitching, and dries out rubber and silicone until they crack and split. Once that process starts, it’s hard to reverse.

    I’ve seen it all—hoses that burst mid-dive, regs that jam up, zips that won’t budge, and wetsuits that stink so bad no one will sit next to you on the boat. Most of these problems have the same root cause: poor maintenance.

    One mate of mine skipped rinsing his gear for a few dives in the Red Sea. Thought he’d “give it a proper wash at the end of the trip”. Big mistake. By dive six, his regulator was spitting water and his BCD inflator button started sticking mid-descent. We aborted that dive, hauled him up, and spent the rest of the day flushing the salt out while everyone else went diving.

    Cleaning isn’t about being fussy or showing off your OCD streak. It’s about safety and longevity. A clean reg breathes smoothly. A rinsed BCD inflates and deflates exactly when you want it to. A well-maintained wetsuit won’t give you skin rashes or stink of mildew halfway through a dive holiday.

    Let’s not forget the health side of things either. Mouthpieces, masks, and snorkels sit directly against your face and in your mouth. If they’re not cleaned properly, they can become a breeding ground for bacteria and fungi. I’ve heard horror stories—divers getting ear infections, sore throats, or full-blown conjunctivitis after using gear that looked fine but had been shoved into a dive bag wet and forgotten for a week.

    Whether you’re renting gear or using your own, cleanliness isn’t optional. It’s the first line of defence against the elements, the environment, and your own human biology. You wouldn’t wear sweaty gym clothes over and over without washing them, right? Diving gear deserves the same respect—if not more.


    The Core Cleaning Principles For All Gear

    There’s no one-size-fits-all cleaning method, but there are a few golden rules that apply across the board. Think of these as your diving gear commandments. Ignore them at your peril.

    1. Rinse with fresh, cold or lukewarm water immediately after use

    Saltwater is your gear’s worst enemy. It creeps into every crevice and dries into sharp little crystals that scratch, crack, and corrode. As soon as you finish your dive, rinse your gear thoroughly with clean, fresh water. Don’t wait until you get home. If you’re still on the boat, use the dunk tank—unless it’s full of everyone else’s grime, in which case, maybe wait for the shore hose. Just don’t leave your gear to dry with seawater still clinging to it.

    2. Don’t use harsh detergents or bleach

    That bottle of kitchen cleaner might get the mould off your tiles, but it’ll destroy your wetsuit lining or damage the inner valves of your reg. Stick to mild soaps—baby shampoo is a favourite among divers for a reason. For more thorough cleans, look for purpose-made gear cleaning solutions designed to be gentle on rubber, silicone, neoprene, and plastic.

    3. Dry it properly—out of direct sunlight

    Sunlight might seem like nature’s dryer, but UV rays degrade most diving materials over time. Wetsuits go brittle, plastic clips weaken, and rubber seals crack. Dry your gear in the shade somewhere ventilated. Make sure it’s completely dry before packing it away—especially if you’re storing it for more than a few days.

    4. Disassemble where possible

    Rinse everything individually. Don’t leave your reg attached to the tank. Take apart your fins if they’ve got removable foot pockets. Open zips, unclip hoses, and separate components. Water needs to reach every part, especially areas that trap grime like velcro, zips, and buckles.

    5. Inspect while you clean

    Cleaning is a great excuse to have a proper look at your gear. Are there signs of fraying on your BCD straps? Is the mouthpiece chewed through? Are your mask straps still stretchy? Catching issues early can stop a minor fault turning into a dangerous failure mid-dive.

    6. Store it right

    Once your gear is clean and dry, store it somewhere cool, dry, and out of direct sunlight. Keep regs in their own bag or box, coiled loosely to avoid strain on the hoses. Hang wetsuits on thick hangers to stop creasing. Don’t chuck everything into one bag and forget about it till your next trip—that’s how mildew wins.

    7. Make it a habit, not a hassle

    The best divers I know clean their kit like clockwork. It’s part of their post-dive ritual—just like logging their dives and checking their air consumption. Once you get into the habit, it becomes second nature. You’ll know your gear’s condition inside out, and you’ll spot anything odd before it becomes dangerous.

    Cleaning Your Diving Gear – One Item At A Time

    Every bit of your dive kit serves a purpose, and each piece needs its own kind of attention. It’s not just about scrubbing the muck off—it’s about understanding how each item works, what can go wrong, and how to keep it safe, comfortable, and reliable.

    Let’s go through your gear, top to bottom, one item at a time.


    Mask and Snorkel

    Masks and snorkels look simple enough, but they’re breeding grounds for bacteria if you’re not careful.

    What to do:

    Rinse both thoroughly in warm fresh water after every use. Pay close attention to the skirt (the soft silicone bit that seals around your face) and the inside of the snorkel tube. If there’s sand or grit stuck in there, swish it around with water and let it drain out naturally—don’t jab anything sharp inside.

    Once a week or after a long trip, soak them in a mild solution of baby shampoo or gear-safe cleaner for a deeper clean. Rinse off the soap thoroughly.

    Things to watch for:

    • Mould build-up inside the snorkel mouthpiece.
    • Tiny cracks in the silicone skirt.
    • Lenses fogging more than usual (which could mean residue build-up).

    Regulator and Octopus

    These are your lifeline underwater. You can’t afford to mess this bit up.

    What to do:

    Always replace the dust cap and make sure no water enters the first stage. Rinse the second stage (the bit you breathe from) in fresh water, but never press the purge button while rinsing—this could force water into the valve.

    Soak the reg and octopus in a tub of lukewarm fresh water for 15–30 minutes. Swish gently to get rid of salt and grit. Dry with a towel, then hang the hoses loosely in a shaded spot to air dry.

    Things to watch for:

    • Sticky purge buttons.
    • Cracked or worn mouthpieces.
    • Hoses with bulges or flaking.

    If anything seems off, take it to a technician. Regulators should be professionally serviced at least once a year—don’t try to fiddle with the inner workings yourself.


    Buoyancy Control Device (BCD)

    Your BCD puts up with a lot—saltwater, sun, rough handling, and all those sweaty boat rides.

    What to do:

    Rinse the outside with fresh water. Pay special attention to zips, clips, and pockets where sand gathers. Then, fill the bladder about a third with clean water through the oral inflator. Swish it around inside, inflate the BCD fully, and let the water drain out through the dump valves. Do this a couple of times to flush everything properly.

    Leave it inflated to dry. This helps prevent the inner lining from sticking together or growing mildew.

    Things to watch for:

    • Stiff inflator buttons.
    • Leaky dump valves.
    • Rust on D-rings or weight pocket clips.

    Wetsuit or Drysuit

    Wetsuits, especially, can get really grim if left damp. They hold sweat, seawater, and whatever was floating about in the water with you.

    What to do:

    Rinse immediately in fresh water. If possible, use a wetsuit shampoo—it helps keep the neoprene soft and gets rid of any odour. Turn the suit inside out and rinse again.

    Hang the suit inside out on a wide hanger, out of the sun. Flip it back the right way once the inside’s dry. Never fold it—it causes creases and weak spots.

    For drysuits, follow the same rinse method but take care with the seals and zip. Use zip lubricant regularly and inspect for nicks or small holes.

    Things to watch for:

    • Funky smell (a sign of bacteria or mildew).
    • Cracked neck and wrist seals on drysuits.
    • Weak seams or worn knee pads on wetsuits.

    Gloves, Boots, and Hoods

    These bits are often forgotten, but they’re just as prone to stink and breakdown.

    What to do:

    Soak in a bucket of warm, fresh water with a wetsuit shampoo or mild detergent. Give them a gentle hand scrub if they’ve got sand or algae stuck on. Rinse thoroughly.

    Let them air dry naturally—don’t stick them on radiators or near heaters. Boots should be stood upright if possible, so they dry inside and out.

    Things to watch for:

    • Cracked neoprene.
    • Peeling soles on boots.
    • Frayed stitching or loosened seams.

    Fins

    Tough and straightforward, but still worth looking after.

    What to do:

    Rinse with fresh water, especially around the foot pockets and straps. If you’ve been diving from a shore, check the blades for grit, stones, or nicks from walking on rocky surfaces.

    Dry fully before packing away. Store flat or upright, not bent or under weight.

    Things to watch for:

    • Cracked rubber straps.
    • Sand caught in buckles.
    • Warping from heat exposure.

    Weight Belts and Integrated Weights

    These don’t need babying, but they do need a rinse.

    What to do:

    Rinse in fresh water, check the belt and pouches for wear and tear. Some integrated weight systems have velcro or zip closures—these can get clogged with sand or salt.

    Dry completely and make sure any metal buckles are rust-free.

    Things to watch for:

    • Rusty clips.
    • Damaged velcro.
    • Cracked lead weights.

    Dive Computers and Gauges

    These are delicate. You need to balance cleaning with care.

    What to do:

    Rinse with fresh water and use a soft toothbrush to clean around the buttons and sensors. Avoid pressing the buttons while underwater or during rinsing unless the manufacturer says it’s safe.

    Pat dry gently. Store in a padded bag when not in use.

    Things to watch for:

    • Fogging under the screen.
    • Slow or glitchy response.
    • Battery corrosion in compartments (for those using user-replaceable batteries).

    Knives, Shears, and Tools

    Any metal tool can rust in a flash if ignored.

    What to do:

    Disassemble if possible. Rinse thoroughly, soak briefly in warm water, and dry fully. Apply a light coat of silicone grease or oil on moving parts and hinges. Store separately in a dry pouch or case.

    Things to watch for:

    • Rust at the joint or blade tip.
    • Dull edge.
    • Loose grip or handle damage.

    Torch (Dive Light)

    A dive light that fails during a night dive is not fun.

    What to do:

    Rinse with fresh water, especially around the lens, switches, and battery compartment. Make sure the O-rings are intact and not pinched or dry. Open it up when dry and store the batteries separately if not in use for a while.

    Things to watch for:

    • Stiff switches.
    • Leaking seals.
    • Corroded battery terminals.

    The Right Way To Clean – Step By Step

    Cleaning your dive kit isn’t just about giving things a rinse and chucking them in the cupboard. There’s an order to it that makes the job smoother and safer. Follow this routine after every dive trip and you’ll get fewer breakdowns, less mould, and a longer lifespan on your gear.


    1. Start With a Freshwater Soak

    Find a tub, bath, or large bucket—anything that’ll hold enough fresh water to fully immerse your gear. Avoid using boiling hot water, as it can damage rubber, neoprene, and certain plastics.

    Submerge your BCD, fins, wetsuit, gloves, boots, snorkel, mask, and regulator. Let them soak for 15–30 minutes to loosen salt crystals and grit. If you’ve got a gear-friendly cleaner (like wetsuit shampoo or a dive-specific soap), now’s the time to add it.

    Pro tip: Use a separate soak for your regulator and computer to avoid banging them against other gear.


    2. Rinse One Item at a Time

    Once the soak’s done its job, take each item out one by one and rinse it under running water. Focus on the nooks and crannies—valves, buckles, pockets, seams. Use a soft toothbrush to reach small areas and avoid using anything abrasive.

    If you’re dealing with silt or algae, especially from quarry dives or river dives, be patient. It might take more than one rinse to clear.


    3. Flush Internals

    Your BCD bladder and regulator need a bit more than a surface rinse.

    For the BCD: Pour a bit of clean water into the oral inflator, swish it about inside the bladder, then drain through all the dump valves. Do this twice.

    For the regulator: Soak only the second stage and hoses. Do not press the purge button while it’s wet, and keep the first stage sealed with the dust cap.


    4. Dry Everything Properly

    Let your gear dry naturally in a shaded, ventilated space. Never leave it in direct sunlight—it’ll cook the rubber, fade colours, and dry out seals.

    Hang your wetsuit inside out on a wide hanger. Place boots and gloves upside down so air gets inside. Lay fins flat or stand them on their sides. Keep regulators and computers on a clean, dry towel.

    Don’t rush this bit. Packing damp gear into a bag is a one-way ticket to the land of mildew and stink.


    5. Inspect While You Clean

    Cleaning time is also inspection time. Check straps, zips, hoses, valves, and buckles. Make sure nothing’s about to break next time you’re 20 metres down. You’ll often spot problems during a rinse—cracks, odd noises, stiffness, or just general wear and tear.


    6. Store It Right

    Once everything’s bone dry, store it somewhere cool, dark, and dry. Hang up your suit and BCD, coil your regulator loosely, and keep electronics in their cases.

    Keep silica gel sachets or dehumidifying packs in your storage area if you live somewhere damp—like, well, most of Britain.


    Special Cleaning Considerations

    Sometimes a standard rinse won’t cut it. Depending on where you’ve dived and what’s happened, you might need to step it up a notch.


    Contaminated Water

    Diving in questionable conditions—urban rivers, near sewage outflows, or post-storm seas—means your gear could have been exposed to bacteria, fuel, or chemicals.

    What to do:

    • Use an antibacterial cleaner or wetsuit disinfectant during your soak.
    • Double rinse everything.
    • Pay close attention to soft materials (like masks and wetsuits) that hold smells and microbes.

    If anything still smells off or causes skin irritation afterwards, bin it or take it to a pro cleaner.


    Urine in Wetsuits or Drysuits

    It’s not a popular topic, but let’s be honest—everyone’s done it. The warmth is great at the time. The smell after? Not so much.

    What to do:

    • Soak in cold water first to dilute.
    • Then wash with wetsuit shampoo that contains enzymes designed to break down odours.
    • Rinse thoroughly and dry inside out.

    Avoid hot water—it cooks the bacteria in rather than washing it out.


    Rinse Tanks and Shared Facilities

    If you’re rinsing gear at a dive centre, chances are fifty people before you did the same. You’re not really washing the gear—you’re just sharing their leftovers.

    What to do:

    • If the rinse tank smells off or looks grimy, avoid it.
    • Always rinse your reg, snorkel, and mask again once you get home.
    • Consider using your own freshwater jug or collapsible tub on trips if you want to be sure.

    Shared or Rented Gear

    You might be cleaning gear you don’t own, especially if you’re renting abroad. Always give shared kit a thorough rinse and sniff test before use. Post-dive, it’s polite to return it clean, but it’s also worth double-rinsing your mouthpieces and masks for your own peace of mind.

    What to do:

    • Use an antibacterial wipe or mouthpiece spray.
    • Don’t rely on dive shop tanks to get rid of whatever the last person did.

    Mould and Mildew Removal

    Found something furry or spotty growing in your BCD or wetsuit? That’s mildew, and it needs attention.

    What to do:

    • Soak in a wetsuit disinfectant or a very diluted white vinegar solution (no more than 1 part vinegar to 4 parts water).
    • Rinse twice with clean water.
    • Air dry fully in shade.

    Be cautious—vinegar can degrade some rubber seals. Test a small patch first.


    Battery Leaks in Dive Lights or Computers

    Nothing ruins a dive light like a battery that’s leaked all over the inside.

    What to do:

    • Remove batteries immediately.
    • Rinse the battery compartment with distilled water and pat dry.
    • Use a cotton swab to clean contacts with isopropyl alcohol (surgical spirit).

    If corrosion is bad or spreading, you may need to replace the torch or computer. Most warranty policies don’t cover battery mishaps.

    Maintenance Routines That Keep You Dive-Ready

    Keeping your gear spotless is one thing. Keeping it in working shape week after week is another. Maintenance is where cleaning becomes habit—not just an afterthought after a weekend dive.


    Checklists Beat Memory

    I learned this the hard way in Malta. I was suiting up for a wreck dive when I realised my inflator hose was cracked. I’d rinsed my BCD a dozen times, but never checked that hose.

    Since then, I’ve kept a checklist—laminated, attached to my gear bag. It walks me through:

    • Rinsing and drying
    • Visual inspection of zips, hoses, seals
    • Functional checks (BCD inflates/deflates, reg breathes evenly, clips fasten)
    • Battery levels on torches and computers
    • Lubricating O-rings or zips if needed

    Print one off. It takes seconds to glance through, and it’ll save you from nasty surprises.


    Weekly, Monthly, Yearly Habits

    If you dive a lot, think in layers:

    • Every week: Rinse and dry thoroughly. Check straps, zips, and seals. Recharge torches and computers.
    • Every month: Take a deeper look. Pull your regs out of storage. Inflate your BCD fully and leave it for a few hours to check for leaks. Wash wetsuits with proper shampoo.
    • Once a year: Get your regulators serviced by a pro technician. Same with your BCD. Replace mouthpieces, hoses, and straps if they show wear. Replace batteries before trips.

    The Big Red Flags

    If you notice any of these, take action before your next dive:

    • Rust or green corrosion near metal parts
    • Cracks in silicone or rubber seals
    • Sticky zips that won’t slide smoothly
    • A strong smell, even after a clean
    • Air leaks, slow deflation, or odd sounds in your BCD or reg

    Better to deal with it in your shed than halfway down a wreck.


    Storage Like a Pro

    You wouldn’t store your car with a brick on the accelerator. Same goes for dive gear—don’t just chuck it in a bag and forget it.

    • Store your wetsuit hanging, zipped up, in a wardrobe or gear closet.
    • Lay regulators flat in a dry cupboard.
    • Keep fins vertical or hung by the heel strap.
    • Use breathable bags, not plastic.
    • Add a few silica gel packets to keep the moisture down, especially if you live near the coast or in a damp bit of Britain (so…most of us).

    FAQs About Cleaning Diving Gear

    We get these questions all the time. Here’s the straight-talking answers.


    Can I use washing-up liquid to clean my gear?

    Nope. Most household soaps are too harsh and strip the natural oils from neoprene, rubber, and silicone. Use a dive-specific cleaner or a gentle baby shampoo if you’re stuck.


    How often should I clean my gear?

    After every dive, no exceptions. If you’ve done multiple dives in one day, you can wait until the end—but don’t let salty, sandy gear sit overnight.


    What about dive computers and torches?

    Rinse them carefully in fresh water, but don’t soak them unless the manufacturer says you can. Always dry them completely before opening battery compartments. And check O-rings before sealing them up again.


    How do I clean the inside of a BCD?

    Fill it halfway with fresh water using the oral inflator, swish it around, then drain through all the dump valves. Do it twice. Never use hot water or soap inside the bladder.


    My wetsuit smells like old fish—help?

    Soak it in cold water with wetsuit shampoo that breaks down odours. Let it soak for a good half hour. Rinse well and dry inside out. If it still stinks, you might need to replace it.


    Can I machine wash or tumble dry any of my gear?

    No. Never. The agitation, heat, and detergent will destroy most dive gear. Stick to soaking, rinsing, and air-drying in shade.


    Do I need to clean gear after freshwater dives?

    Yes. Freshwater might not have salt, but it has minerals, silt, algae, and bacteria that still need to be washed away.


    Final Thoughts On Staying Safe And Dive-Ready

    I still remember my first proper kit—second-hand fins, a leaky mask, and a wetsuit that smelt like the bottom of a boat. Back then, I didn’t know how to care for gear, and to be honest, I didn’t see the point. That changed after I had a mouthful of seawater on a 12-metre dive because my second stage failed.

    These days, I treat cleaning and maintenance like packing a parachute. It’s not a chore—it’s peace of mind. A well-rinsed reg, a clean wetsuit, a spotless BCD… they don’t just last longer, they feel better. They remind you that you’re prepared.

    Your gear is your lifeline. Whether you’re diving wrecks off Cornwall, reefs in the Red Sea, or a murky British lake with visibility like soup, you need to trust what’s strapped to your back.

    Take the time. Do the clean. Make it routine. Your future self—sitting in a dive boat somewhere beautiful, knowing your kit’s spot-on—will thank you for it.

  • Window Cleaning

    Window Cleaning

    Expert Streak-free Finish Glass Polishing

    Clean windows change how a home feels. Natural light flows better, rooms look larger, and the whole space feels fresher without moving a single piece of furniture. We treat window cleaning as a detail-focused task that needs the right technique, tools, and patience.

    London windows face a lot. Traffic fumes, rain marks, pollen, and everyday dust build up faster than most people expect. Our window cleaning service tackles that build-up safely and thoroughly, leaving glass clear without streaks or residue.

    Our approach to professional window cleaning

    Preparation sets the tone. We check window types, access points, and surrounding areas before starting. Frames, sills, and seals all matter just as much as the glass itself. Dirt left behind in those areas quickly spoils the finish.

    Our cleaners work carefully and methodically. We remove surface dust before washing to avoid scratching. Cleaning solutions get applied evenly and allowed time to break down grime. Squeegees and cloths then lift away residue in clean, controlled passes.

    Safety always stays front of mind. We only clean windows that can be accessed safely from inside the property unless prior arrangements exist. Upper-floor interiors, balcony doors, and internal glass panels all receive the same careful handling.

    Attention goes beyond obvious marks. Fingerprints, pet nose prints, and water spots around edges often get missed during quick cleans. We focus on those details because they make the difference.

    What our window cleaning service covers

    Our service includes internal window cleaning as standard. External cleaning can be discussed separately depending on access and property type.

    Glass surfaces

    • Internal window panes
    • Patio doors and balcony doors
    • Glass room dividers
    • Internal conservatory panels

    Frames, sills, and surrounds

    • Window frames wiped clean
    • Internal sills cleared and cleaned
    • Edges and corners detailed
    • Handles and visible fittings wiped

    Finishing touches

    • Removal of smears and streaks
    • Buffing for a clear finish
    • Final visual check from multiple angles

    Curtains and blinds remain undisturbed unless clients request otherwise. We work neatly and leave surrounding areas tidy once the job finishes.

    Products, tools, and surface care

    The right products protect both glass and frames. We use gentle, effective cleaning solutions designed for domestic windows. These lift dirt without damaging seals, coatings, or surrounding paintwork.

    Our tools include:

    • Professional squeegees
    • Microfibre cloths for streak-free drying
    • Soft scrapers for stubborn marks
    • Extension tools for safe reach where needed

    Cloths get rotated frequently to avoid smearing. Water stays clean and refreshed throughout the task. Dirty tools never touch finished glass.

    Modern windows often include special coatings or treated glass. We adjust techniques to suit those surfaces. Abrasive pads and harsh chemicals never get used.

    Respect for homes and routines

    We treat window cleaning as part of the wider home clean rather than a standalone task. Floors beneath windows stay protected, and drips get wiped immediately. Furniture and personal items remain respected and untouched.

    Timing matters too. We clean windows at points that reduce disruption, especially in busy households or flats with shared spaces. Clear communication helps everything run smoothly.

    Clean windows should last. Our careful method slows down the return of dust and water marks, helping homes stay brighter for longer.

    Window cleaning often feels like a small detail, yet it shapes how a home looks and feels every day. We handle it with care, consistency, and respect during each visit, leaving glass clear and light flowing freely once again.

  • Bathroom Cleaning

    Bathroom Cleaning

    Limescale Removal And Mould Prevention

    Bathrooms demand more care than almost any other room. Daily use, moisture, and heat create the perfect conditions for limescale, soap residue, and bacteria to build up fast. We approach bathroom cleaning with precision, patience, and a clear focus on hygiene.

    A clean bathroom should feel calm and fresh, not sharp with chemicals or damp smells. Our service restores that balance through careful methods and close attention to detail. Each visit aims to leave the space hygienic, dry, and comfortable to use straight away.

    Our approach to bathroom cleaning

    We start with an assessment of the space. Size, layout, ventilation, and surface types all influence how we clean. Modern bathrooms often mix chrome, glass, ceramic, and stone, each needing the right treatment.

    Our cleaners work from higher surfaces downwards. That order prevents residue from falling onto freshly cleaned areas. We allow products time to work rather than scrubbing aggressively. Limescale and soap build-up lift more effectively with patience.

    High-touch points receive special focus. Taps, flush handles, switches, and door handles collect germs quickly. Those areas get cleaned and sanitised carefully during every visit.

    Ventilation also matters. We wipe vents and visible extractor covers to reduce dust build-up. Drying finishes the process, as trapped moisture encourages marks and mildew.

    What we clean during a bathroom service

    Our bathroom cleaning covers all core areas as standard. We tailor the service if a household has specific needs or preferences.

    Fixtures and fittings

    • Toilets cleaned and sanitised inside and out
    • Sinks and basins
    • Baths and shower trays
    • Taps, handles, and fittings

    Showers and screens

    • Glass panels and doors
    • Tiles and grout within reach
    • Shower heads and controls
    • Soap dishes and shelves

    Surfaces and finishing areas

    • Wall tiles and splash zones
    • Mirrors and glass
    • Skirting boards
    • Floors vacuumed and mopped

    Bins get emptied and wiped, and visible hair or debris gets removed from corners and drains. Final checks catch smears or water marks before we leave.

    Products, hygiene, and surface protection

    Bathrooms need effective products used with care. We select cleaners that remove bacteria, limescale, and residue without damaging surfaces or seals.

    Our kits include:

    • Anti-bacterial bathroom cleaners
    • Limescale removers for taps and glass
    • Non-scratch pads for delicate finishes
    • Microfibre cloths colour-coded for hygiene

    Toilet areas use dedicated cloths and tools only. That separation prevents cross-contamination and keeps standards high. Cloths and gloves get changed during the clean where needed.

    We avoid overpowering scents. Bathrooms should smell clean, not masked. Rinsing and drying remove residue and leave surfaces smooth to the touch.

    Chrome and glass receive extra care to prevent streaks and dulling. Grout lines get attention without harsh scraping that causes damage over time.

    Respect for privacy and routine

    Bathrooms are personal spaces. We work discreetly and follow household instructions carefully. Personal items remain undisturbed unless clients request otherwise. Storage areas stay organised and respected.

    Timing matters too. We clean bathrooms efficiently to reduce downtime, especially in homes with shared facilities. Clear communication helps us work around daily routines.

    A properly cleaned bathroom changes how a home feels. Mornings feel easier, and evenings feel calmer. We aim to deliver that comfort through consistent standards and thoughtful care during every visit.

    Bathroom cleaning forms a core part of our service because hygiene matters where it counts most. We handle the task with professionalism, care, and quiet attention to detail, leaving bathrooms fresh, safe, and ready for everyday use.